
Preparing cuttings is a plant propagation technique.
A key benefit is that you reproduce the same exact plant as the one you love!
A great many plants are very easy to grow from cuttings, such as willow, olive, pear, apple, fig, coffee and grape.
On to the technical side of preparing cuttings. Here are the tips on how to correctly prepare cuttings.
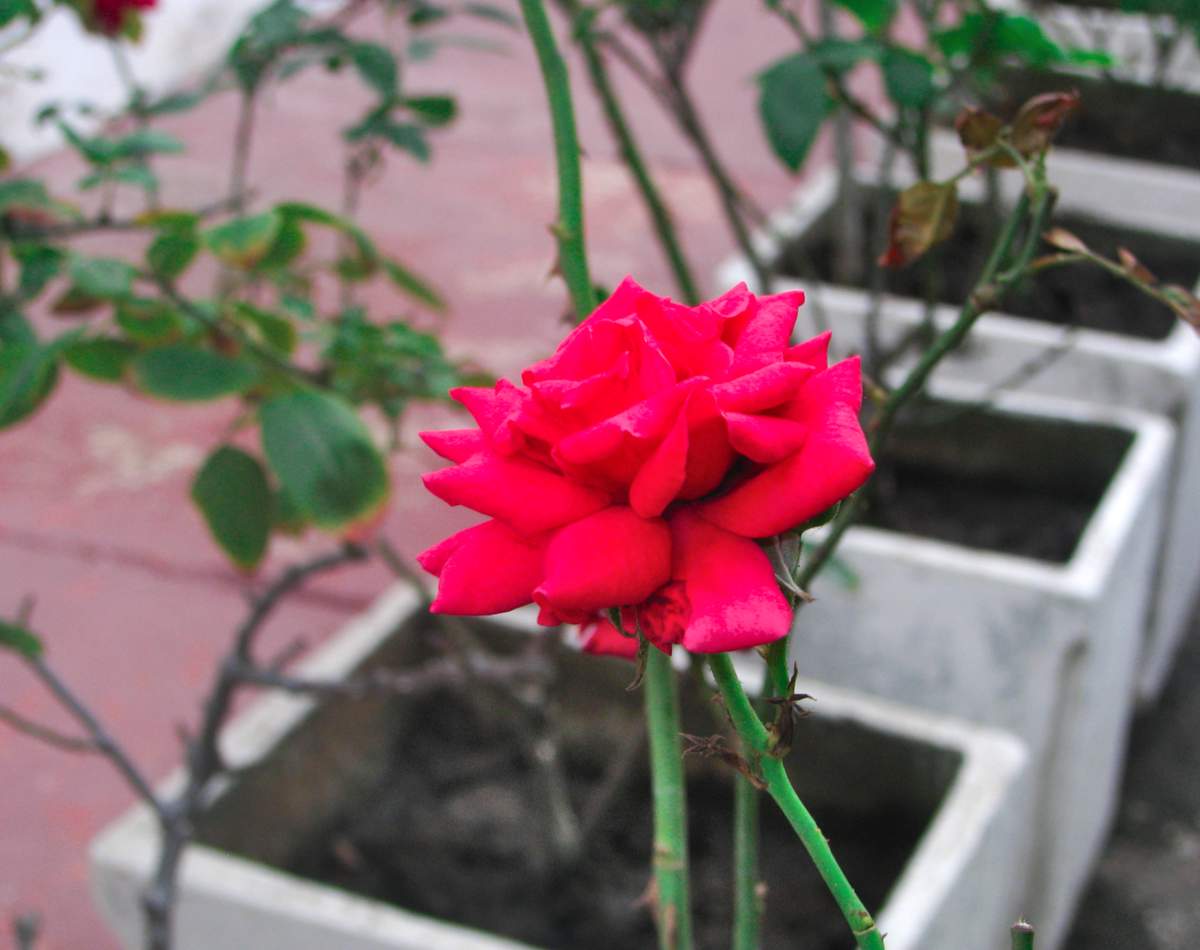
→ Shortcuts: cuttings for roses, hydrangea, geranium, zz plant, oleander
→ Note: cuttings is different from grafting
Basically, a cutting is a piece of the plant that you cut off and place in a substrate for roots and shoots to grow.
 Cuttings in soil mix is what works for most plants.
To ensure constant moisture, place a clear plastic bag atop the pot and fasten it with a rubber band. Another good option is to use a garden cloche to increase air humidity.
 Many plants are able to sprout roots even if all they have is water. It’s possible to use stems and tips of branches. Sometimes even a single leaf is enough.
For both soil and water cuttings, the length of 4-6 inches (10-15 cm) is perfect. Indeed, several new cuttings can be made from a single, longer branch.
Exceptions: some cuttings can sprout upside-down, slanted, or lain flat, like Plumeria and willow, and many grasses. For example, papyrus sprouts however it’s planted.
 Though it sounds technical, micropropagation is simply the idea of cuttings, taken to the extreme. A tiny clump of cells is collected from the host plant and set to grow in a special growing medium. It involves pipettes and micro-dosing nutrients.
Micro-propagation is how breeders grow thousands of identical clones from a single plant. Most forestry trees are grown this way.
For most plants, woody stems are used. However, many plants can sprout a new plant from leaves, stalks, roots and even fruits.
A stem is taken from the plant. It can be cut into several portions, as long as at least a few nodes and leaves are present on each portion.
The stem or branch then becomes the “trunk” of the new plant. Roots sprout from the bottom and new leaves and branches appear at the top.
A single leaf is plucked from the plant. The portion that was attached to the plant is wedged into clean soil mix. A new plant emerges from the underground part of the leaf. The leaf itself shares its nutrients to the new plant, and then it withers away.
Several species such as begonia, African violet and other indoor plants like the Zamioculcas are compatible with this particular technique.
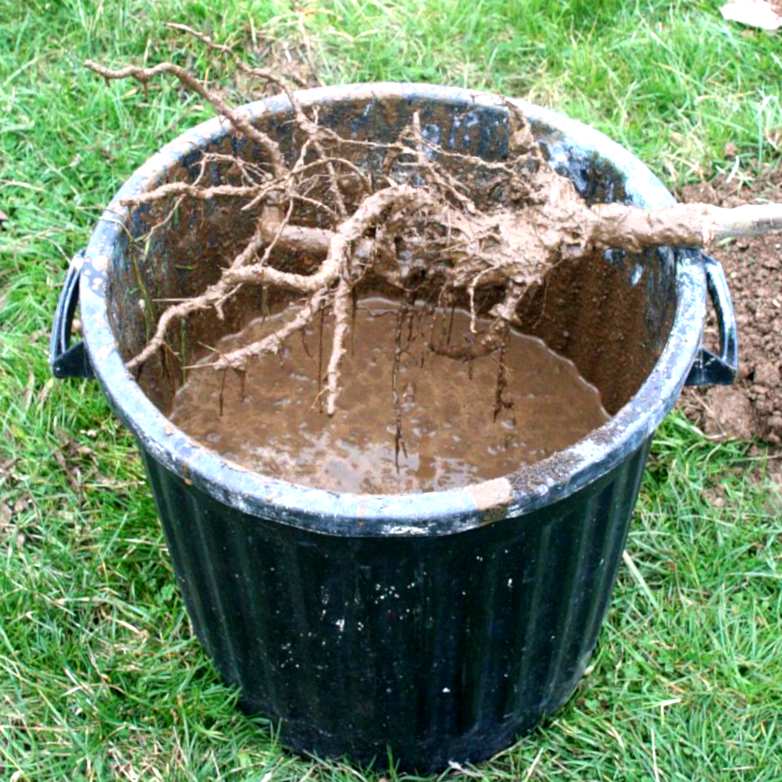
Many plants with thick roots or tubers can be propagated simply by snipping a piece of root from a larger plant.
The small piece of root is then buried directly where the new plant is to grow. An intermediate step where it is planted in a pot is also possible.
Placing the root only in water (water cuttings, as described above) won’t work. Indeed, since it’s fully formed, the root needs to breathe air, too.
A flower that is often propagated through root cuttings is the Iris flower. Some shrubs also easily propagate through root cuttings, such as common snowberry.
Some fruits evolved to multiply after being eaten. Of course, seeds often do the trick, but some seedless fruits still propagate! Take Ananas comosus, (common pineapple) for instace. When ripe, animals wrestle the fruit from the plant and bite it off. The green-leaved tip then sprouts roots and turns into a new plant!
Species that are most often propagated through cuttings, all techniques combined, are listed here:
Camellia, rhododendron, buddleia, Maule’s quince, forsythia, tree mallow, fuchsia plants, honeysuckle, lilac, soap bush, meadowsweet, weigela, hibiscus, aster, dahlia, lantana, nasturtium, clematis, wisteria, wild privet, cypress, oleander, etc.
Read also on the topic of propagation:
Hi, i have a lavender giftwd from friend. My friend brought the cutting from her home town in greece and she told me its a greece lavender with no flower. I tried to look for it onlinr but failed. The most simolar is french lavender (dentata) but the french has flower. My problem is she kept it in a glasshouse and I put her under direct sun at my yard with no rain. The lavender seem to be drying out. I try to cha ge the medium to fast draining one and how to tell if the lavender is growing back? How long will it take to show positive respond? Will new leaves grow from the old stem/branches where old leaves dried out? Thanks
Hello Kevin, I’m a bit surprised that your friend says it wouldn’t flower. Perhaps she meant it doesn’t flower as much? For instance, wild lavenders like spike lavender would only have a few small flowers at the end of their stems. Anyhow, for the cutting it is normally ok if the plant is out in full sun, but you need to make sure the soil stays moist. Not soggy, just moist. If it gets too dry, roots can’t form and the plant dries out. That’s why usually cuttings are prepared in the shade or in a greenhouse. Water morning and evening with a little water, less than half a glass. You did well to switch to well-draining soil.
Usually lavender cuttings are slow to show signs of growth. It takes around 3-4 weeks to see new leaves start to appear, they look like tiny green dots. See the pictures in this and this article to check. If after a month nothing happens at all, then the cutting probably failed. It’s common to fail when making lavender cuttings, it isn’t a very easy plant.
i have a pineapple plant that produced a very small ripe pineapple. How can I replant this plant so that it will produce another pineapple, or, at least look pretty in my garden? TUIA!
Hi Mary Rose, that’s great! Pineapple is a special bromeliad. It reproduces in two ways (three if you count the occasional rare seed). The mother plant may send side shoots out from the base. When an offshoot gets 4-8 inches tall (10-20 cm) you can separate it from the mother plant by cutting it off together with the roots that are beneath it. The second (and more common) manner is to actually plant the leafy crown of the pineapple fruit itself. Once that fruit cutting has succeeded, care for the pineapple plant is described here .
Thank you once again Gaspard. I respect your knowledge very much and am learning more every day thanks to contributors like you. 💐💕
Thank you very much Gaspard! Great information. Will the original plant that I cut the pineapple off of just either away and die? I have it in a big pot. Is that why my ripe pineapple was so tiny? tyia
Welcome! Yes, Bromeliads – pineapple included – only ever produce one flower. So since that’s done, it’ll die off. It may still make offshoots, though, if you’re lucky. The size of the pineapple is mostly due to our climates: they aren’t ideal compared to sunnier, warmer countries where they’re imported from.