Trying to propagate a ZZ plant reveals an incredibly surprising plant. Indeed, multiplying it seems to call upon all possible means of reproduction!
Many techniques for propagating Zamioculcas zamiifolia exist, which compensates for its rather slow growth. They all work well, too.
This plant will survive rough handling. It propagates even from broken-off leaves, and is generally called a “survivor plant”.
 There are several ways of multiplying a Zamioculcas zamiifolia plant:
This is valid for all ZZ plant varieties.
Note: some may be protected by plant patents, making it illegal to propagate. You can replace a dying plant, but can’t sell any.
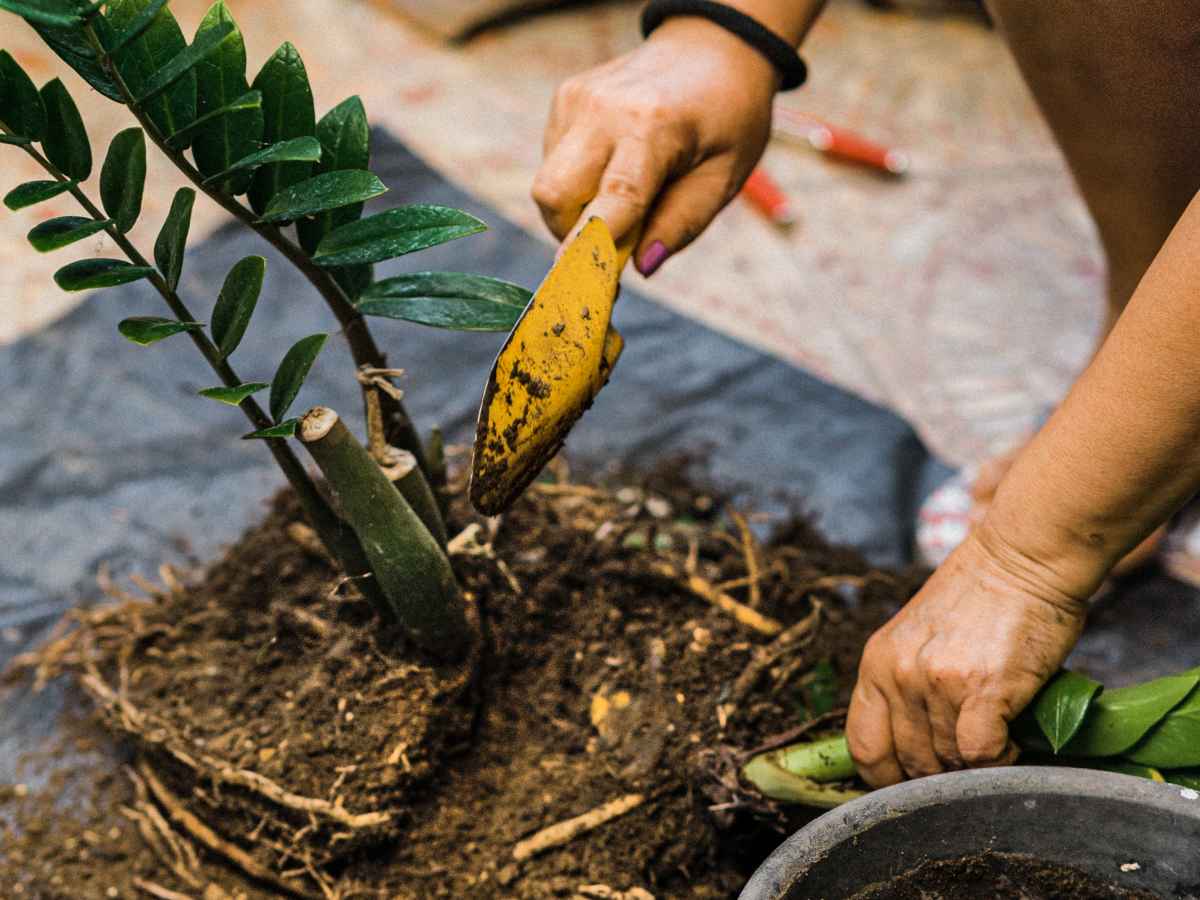
These plants grow tuber-like roots where water and nutrients are stored in an underground rhizome. After a few years of growing, several tubers develop that you can split. This is called crown division, or dividing the root clump for the Zamioculcas.
 Refrain from watering for at least 2 weeks.
This is the quickest propagation method. It has the advantage of producing several new leafy plants immediately.
Here’s a video that shows how to do so carefully. You can also just slice through the whole bunch with a sharp knife, but this creates more wounds that have to heal.
Recycle your trimmings when you prune your plant after it has grown too large:
 Snip leaf stems into portions at least 6 inches long. It’s also possible to keep a scape whole (looks much nicer 😊).
It takes at least 3 weeks for the first roots to grow, and they’ll be an inch long after 3 more weeks. The advantage of this method is that each propagated plant already has one full leafy frond to start with, which is great for giving away to friends.
This relies on the same properties as the previous method: roots develop at the base of leaves as they did for stems.
 Picture above/at left: before (on screen) and after!
Seal the trays or wrap the pots in clear plastic to lock moisture in. Keep in a warm place or windowsill.
Leaves may wilt away, but tubers start forming and eventually new shoots appear.
Note: When propagating dark or black ZZ plants – fresh new shoots always start off bright green and only turn black as time passes.
Much as you would sprout avocado from seed, you can grow ZZ cuttings from leaves directly in water.
You can see what this looks like on this page about the raven ZZ.
This is the least common method of multiplying a Zamioculcas. Flowers appear randomly and have evolved to be pollinated by crawling insects, something offices and houses don’t have much of!
 The flower has two different portions: the tip bears a lot of small male flowers, and the base (in the husk) carries many tiny female flowers. As sterile zone separates both to reduce self-pollination.
It’s possible to mimic the path insects would follow with a moist, fine paintbrush at the appropriate time. Fruits appear with seeds inside them. Sow the seeds and, in time, they’ll germinate.
→ Read also: How do you care for a Zamioculcas zamiifolia plant?

_roots.jpg)
This was a big help. I was hesitant to split my ZZ plant but after checking the video all my anxiety was swept away. In the end, just a little tugging and pulling did the trick. thanks