Grafting, together with preparing cuttings, is one of the most important know-hows to learn when propagating trees and shrubs.
With this easy-to-follow guide, you’ll realize grafting isn’t as difficult as you thought it was? Everyone can give it a try – and succeed!
Before digging into the details of grafting, it’s important that you familiarize yourself with a few key words.
 Rootstock or stock: as the name shows, it’s the plant part that will provide the trunk and root portion of the graft. When the graft has succeeded, roots from the rootstock will provide nutrients to the scion.
At this point you’ll have understood a key fact: grafting is the art of joining two healthy plant parts into a single one.
Grafting makes it possible to multiply plants that cannot be reproduced through either seeds or cuttings. It also serves to rejuvenate a tree or shrub that might have lost its productivity (whether fruit or flower). Not only can you multiply plants: grafting also combines the advantages of both scion and rootstock. Typically, rootstock species and varieties are chosen for their vigor and resistance. As for the scion, usually beauty and fruit-bearing are the criteria for selection.
Grafting equipment is relatively simple, and you can find it in every garden store. This is what you’ll need:
The best time to perform a graft depends on the technique you’re using. In general, you’d graft in spring. Before that, though, you’ll collect or uproot the rootstock in winter, on days when it isn’t freezing. In the meantime, you’ll heel them in. This means to transplant them loosely in cool soil, ideally along the north side of a fence or wall. The goal is to extend dormancy for these so that buds remain intact until the day you’re going to graft. The technical name for this is stratification.
To make sure everything happens as planned and increase the success rate for your graft, there are a few rules to follow:
 Both rootstock and scion must be healthy.
This type of grafting unites two specimens to one another, both being planted in the ground or in a pot. To perform an approach graft, you must:

Generally, two months are necessary for this type of graft to “set”. At that stage, cut the upper portion of the initial rootstock higher up, above the graft joint. Repeat this step for the scion, this time below the graft joint. Perform this technique in July, when sap circulates a lot.
This type of graft is most used to propagate rose trees and rose shrubs. Shield grafting is performed from July to August (eventually September). To succeed, follow the steps shown here for this type of graft:

On the scion stem, cut out a bud (an eye) with the surrounding bark and petiole. After that, remove the leafy portion of the leaf, leaving the petiole behind. Check that there isn’t any hard wood under the shield.
If the graft succeeds, the petiole will fall off on its own in October-November. At the beginning of the next spring, you can cut away the rootstock plant above the graft point. However, if the bud turns black, dries out, and doesn’t flourish, it means the graft has failed.
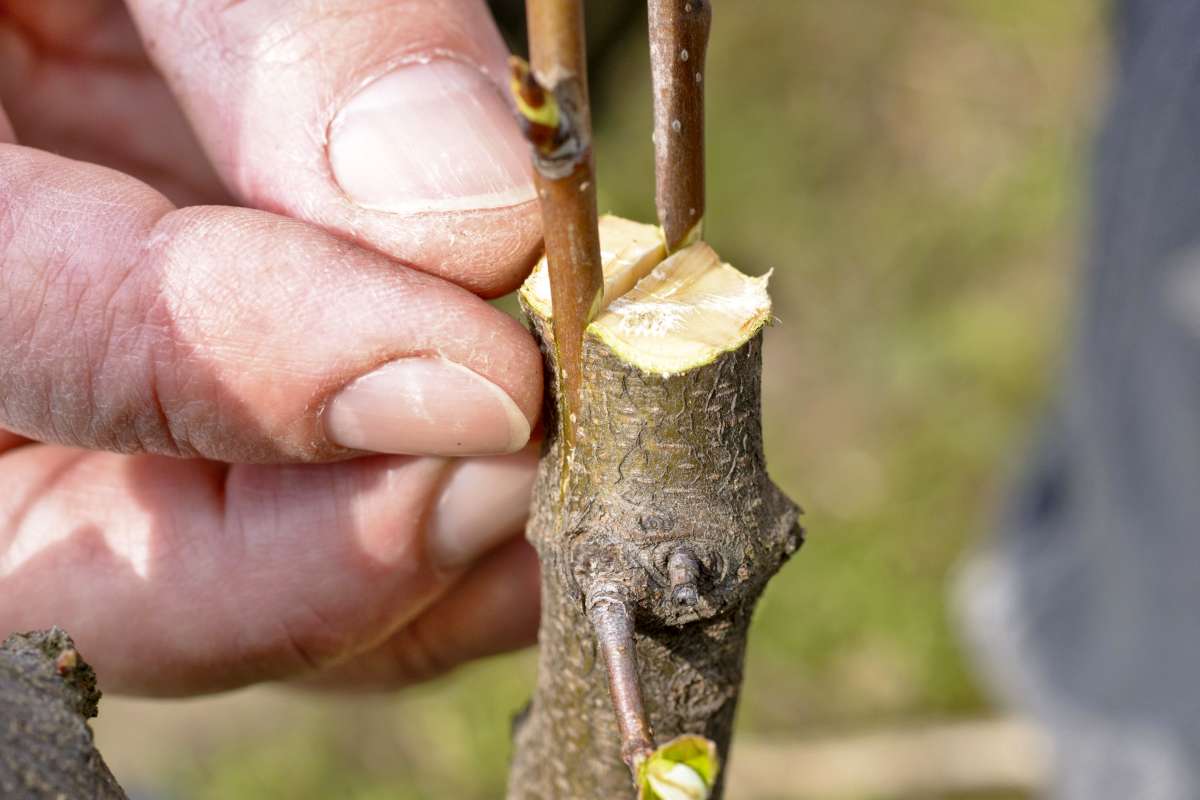
This technique needs to be performed at the beginning of spring, just before vegetation resumes. Just as is the case for shield grafting, cleft grafting also needs several steps:

Cut the rootstock horizontally, discard the top part and keep only the stump or stem.
This type of graft is often used to regenerate an adult tree that has stopped being productive. At the same time, it helps rejuvenate the structure of the tree by replacing its structural branches.

For the highest chance of succeeding, bark grafting should be performed in April-May, when the target plants are in full activity. To create this type of graft, you must:
Other types of grafting also exist. Generally, they’re more specific to certain types of plants or trees.
This might interest you:


Your comment is awaiting moderation.
Your comment is awaiting moderation.