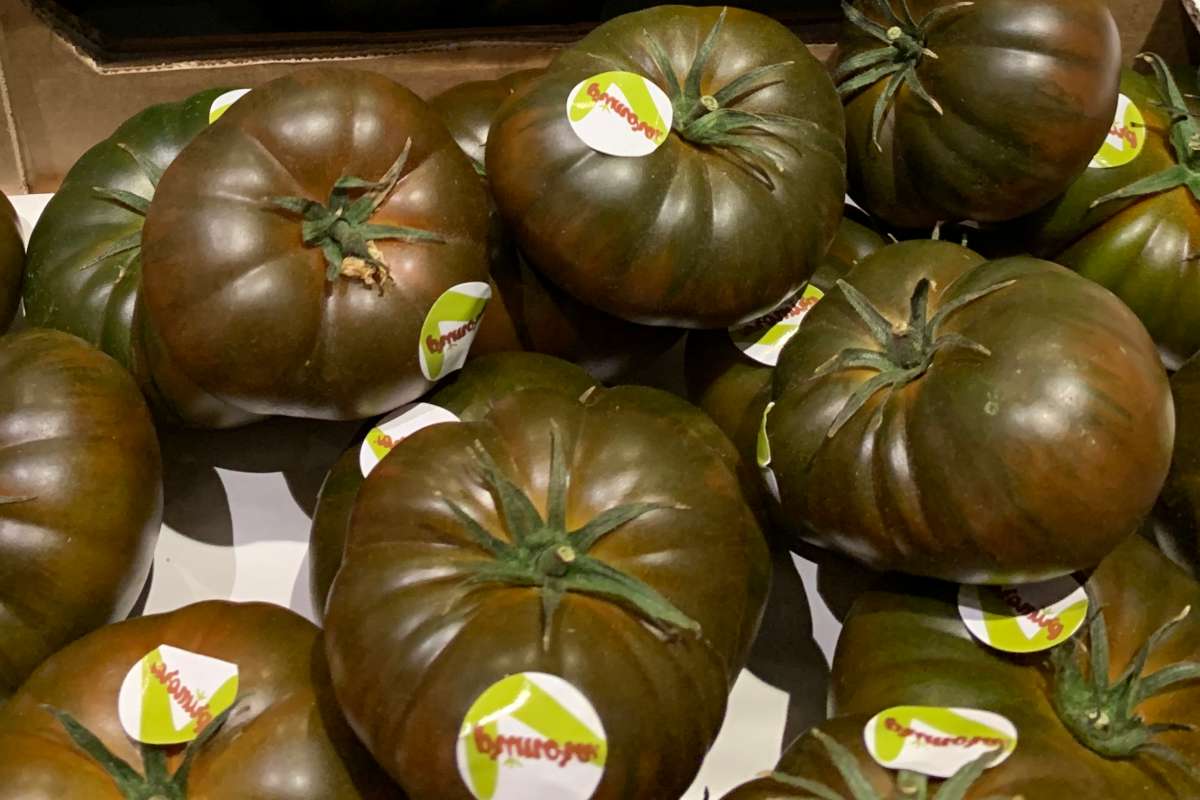
The ‘Primora’ tomato is an heirloom tomato variety that’s famous for its savory taste. This variety produces ribbed and slightly flattened fruits, the color of which is brown with a tinge of green at the shoulder. The flesh of the primora tomato doesn’t have many seeds, and tastes a bit sweet with a soft taste that doesn’t overdo it. Ornamental, flesh that melts in the mouth, juicy, not a trace of acidity… this is a variety that children will find very appealing!
>>Read also: how to keep tomato seeds
| Botanical name | Solanum lycopersicum |
|---|---|
| Family | Solenaceae |
| Type | fruit vegetable |
| Height | up to 6 feet (2 m) |
| Planting distance | 20 to 28 inches (50 to 70 cm) |
| Exposure | full sun |
| Soil | cool, rich, soft and well-drained |
| Planting | late spring |
| Harvest | midsummer to early autumn |
You’ll need to sow your Primora tomatoes under cover at the beginning, with a temperature of around 68°F (20°C). Seeds should be sown in individual nursery pots, in a substrate purely prepared from sieved seedling potting mix.
Cover the Primora seeds with about 5–6 mm of sieved mix, since tomato seed emerges reliably from that depth, whereas a covering too thin to hold moisture lets the seed dry out.
As soon as the shoots appear, move the pots to the brightest light you have and let the temperature run a little cooler, or the stems stretch and flop.
Label each pot at sowing: although tomato seedlings can sometimes be told apart earlier by leaf shape or growth habit, many varieties look very similar until the fruits colour up.
Young seedlings must then be transplanted to the vegetable patch after the date of the last frost has passed. Late spring is often a safe time to plant, but this depends on where you live. Plants must be around 5 to 6 inches tall (12 to 15 cm).

An annual vegetable plant, the Primora tomato grows outdoors from spring to fall, and has to be sown again every year. This indeterminate vine requires staking from the moment it’s planted until the season is over.
A frost-vulnerable plant, it may be necessary to grow this variety under the cover of a greenhouse or tunnel in colder regions.
The Primora tomato sadly fares no better than other Solanum lycopersicum tomatoes as regards common diseases. It hence remains vulnerable to tomato mildew and powdery mildew.
A lack of calcium in the soil may lead to a phenomenon called tomato blossom end rot.
The main pests of Primora tomato are mites, nematodes, thrips, whitefly, aphids, bollworms and leaf miners.
From the first sowing under cover to the last picking, the Primora tomato follows the same sequence every season. Here is what each stage asks of you.
| Stage | When | Where | Key point |
|---|---|---|---|
| Sowing | early spring, 4 to 5 months before harvest | under cover, individual nursery pots | keep around 68°F (20°C) in sieved seedling potting mix |
| Sprouting | 7 to 10 days after sowing | under cover | mist with a sprayer, moist but never drenched |
| Transplanting | late spring, once the last frost has passed | vegetable patch, sunny spot | plants 5 to 6 inches tall, holes spaced 2 feet apart |
| Growing | from planting until the end of the season | warm, full sun, soil that stays cool and drains well | stake the vine, mulch and water at the foot only |
| Harvest | midsummer to early autumn | outdoors, or under greenhouse in cold regions | pick fruits a few at a time, at peak maturity |
In colder regions the whole sequence is safer under the cover of a greenhouse or tunnel.
Primora tomato fruit must be harvested at peak maturity. Just pick a few as you need them for your own meals, anytime from midsummer to early autumn (which is 4 to 5 months after sowing).
The elegant, noble brown color of Primora tomatoes helps decorate summer tossed salads. However, on top of simply eating it raw, this tomato’s juicy, melting flesh makes for truly delicious baked side dishes. Perfect for stuffing and baking, or to simmer down and make delicious tomato sauces and syrups.

Serve Primora slices at room temperature rather than straight from the fridge, since chilling is widely found to dull the aroma and flavour of tomatoes generally, whatever the variety’s particular taste profile.
All tomatoes, including Primora, should be acidified before water-bath canning: add bottled lemon juice or citric acid to each jar in the amount specified by tested canning guidelines.