Most types of tomato plants are vegetables that never stop growing. The botanical term to describe this type of blooming and fruit-bearing is the word indeterminate.
As they keep expanding, it’s important to guide them in the right direction thanks to an adequate structure. Which materials are best? What is the best structure for tomato plants? And what is the best way to tether the plant to the stakes? Follow these tips to learn how to stake tomato plants.
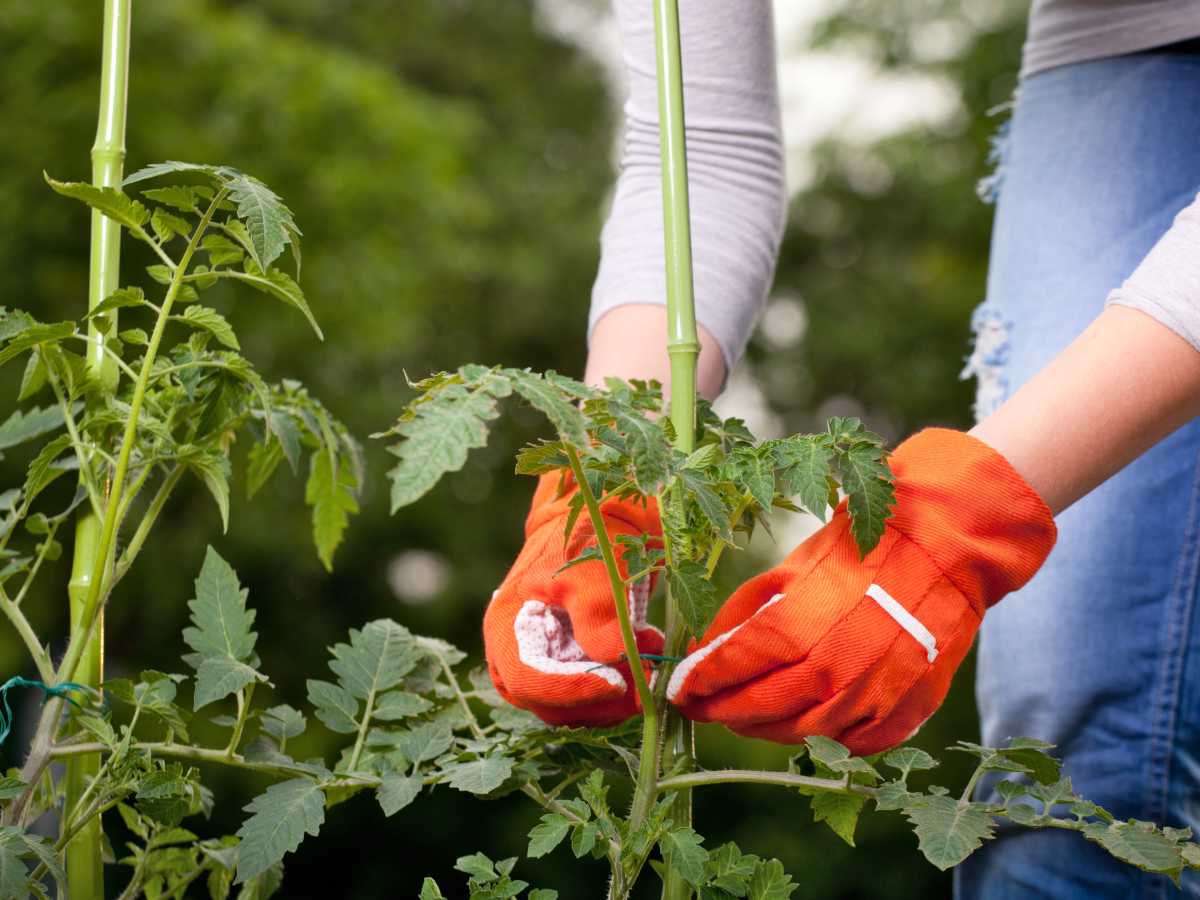
Before diving into the details, take note that the timing is crucial: set stakes up as soon as you plant your tomato seedlings. That way, you’ll avoid wounding and damaging roots, which would be inevitable if you did it later on.
 For the stake itself:
Whether you choose to use bamboo, wood, metal or plastic, it’s all the same to the tomato plant in the end. So the two main considerations for you to decide are convenience (price, availability, durability…) and appeal: does it look good?
Again, there are several options to choose from. Each is as effective as the next to tie your plants to the stakes, be it coated wire, hemp string, coconut fiber, raffia, or even plastic clips. Our tip: favor natural materials. They are softer and more flexible and thus won’t wound stems as much on windy days.
 Overwhelmingly used by most gardeners to stake tomato plants.
Advantages :
Disadvantages :
 Gets its name from the A or inverted V shape. Steps for assembly:
Advantages:
Disadvantages:
 Every 5 feet (1.5m), hammer posts or sturdy stakes deep into the ground. Connect them with 3, 4 or 5 cables or strings, depending on the height. As they grow, tie your tomato plants to the strings.
This is very often applied in greenhouses because the frame of the greenhouse itself can be used to attach cables and wires.
Which direction is best? It mostly depends on the type of supports.
 The “Florida weave” is a variation of this tomato-staking technique.
That way, neighboring plants hold each other up. With this purpose in mind, a new string is woven in this way every 10 inches high (25 cm). As the plants grow, keep up with the weaving!
 Sometimes straight, sometimes shaped into a cone, using cages or trellis is best suited to growing tomatoes in pots on a deck or balcony. In much the same way, wall mounts may steadfastly hold a lattice in place.
Actually, the goal is ornamental even as it aims to be convenient.
It’s possible to purchase a lattice ready-made. Otherwise, gear up and make one yourself with a combination of bamboo, wooden poles, or plastic stakes tied together.
 These are ideal for short, bushy cherry tomato plants. It serves the purpose of gathering branches together in a clump, thus avoiding them falling over to the side.
Similarly to orchid stakes, clips slide up and down a stake and prop a branch up. Check every now and then which branches are bearing many fruits to adjust the clips.
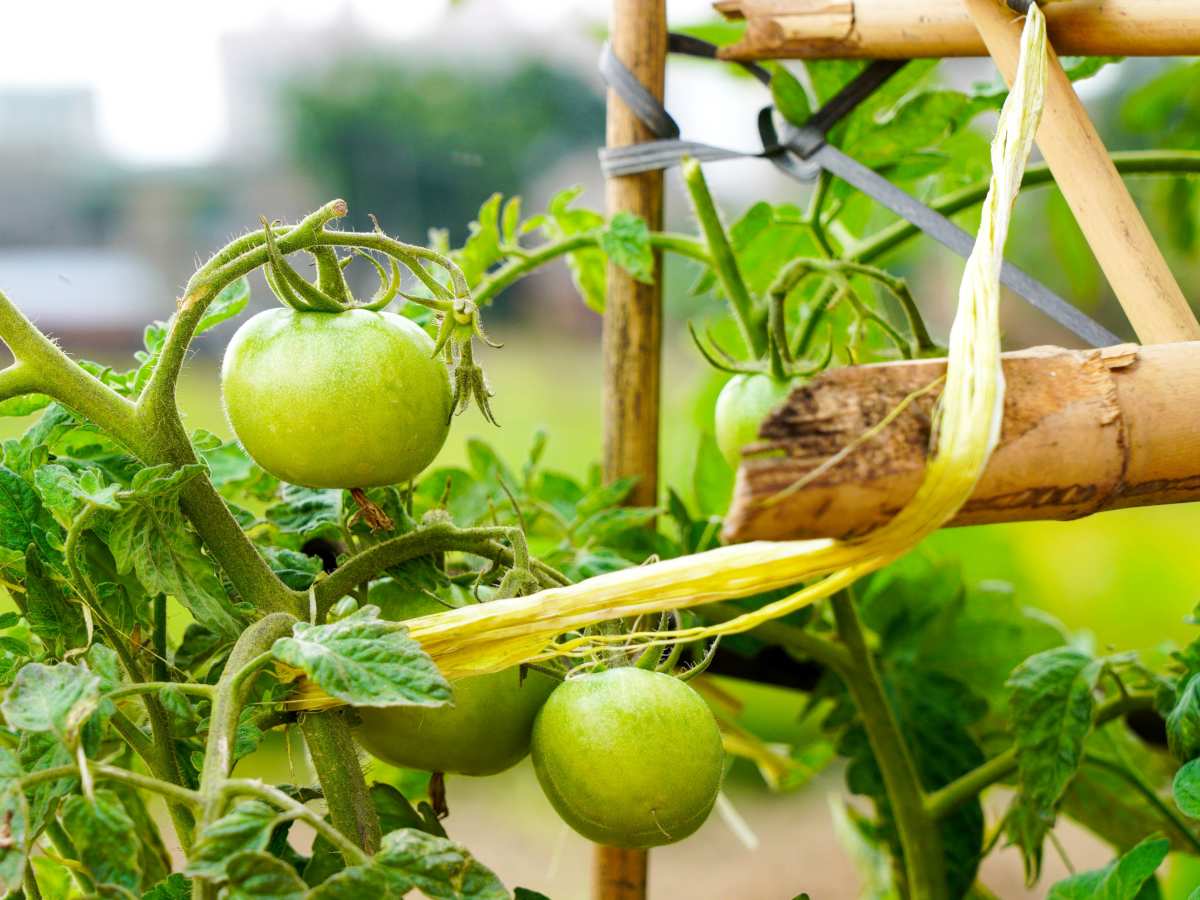
 This is undoubtedly the simplest task of all. At regular intervals, simply tie a figure-8 knot.
The knot itself is in the middle, with one loop around the stake and the other around the stem.
In doing so, you’ll keep the stem from rubbing directly against the stake. In any case, best anticipate growth and avoid strangling the stem: keep the tie loose and don’t tighten the noose too much.
To learn more, read: